I think its’ fun to combine the real world and the digital world. Printing a design that started as a processing sketch by hand does exactly that. This is a quick rundown of the process for anyone looking to try it out. I’m not covering the processing or silk screen part, but I highly recommend trying them out.
This process is pretty simple and could work for other styles of printing as well. For example, if you reverse your art at the last step, you can use it to burn plates for letterpress printing instead.
So, here’s how to get a Processing sketch ready to silk screen:
Recording the sketch to PDF
![]()
The best part here is that your sketch doesn’t need to be static. Even if it’s going to end up on paper, it doesn’t have to look like paper to start out. You can have it animate, or randomize shape and size each time you click. I like to randomize on click. It’s an easy way to get a whole lot of variations.
Processing’s PDF library is included with processing and the PDF library page on processing.org has multiple code examples. Seriously, they’re very good example. Just copy and paste a few lines of examples code into your file and you’re good to go. Recording when you click lets you grab multiple variations of a sketch to PDF files.
Generally, I make my sketch pretty small, maybe 400 or 600 pixels wide. Since this is all vector, it’s easy to scale things up as needed. Your sketch doesn’t have to be 1:1 with what you’re planning to print.
Editing Processing’s output

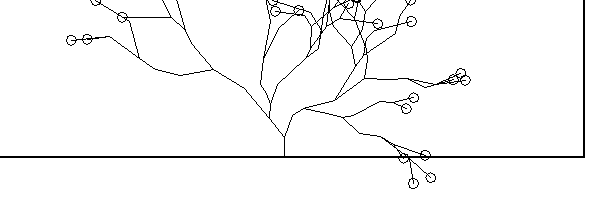
Processing output with the outline
Processing will automatically save the generated PDF(s) to the same folder your sketch is in. You can open these up directly in Illustrator to start editing.
Initially, all elements of your sketch will be in one big grouping with an outline of your sketch’s dimensions. Use the Direct Selection or Group Selection tool (keyboard shortcut “A”, or the “white arrow”) to remove the outline. Add, move or remove elements from your sketch to get it to look how you want it to. I tend to do a lot of this clean up and moving around in outlines mode. There’s almost always some extra shapes or strokes in the PDF output.
Play around. Remove elements, Add elements… whatever works.
Change the dimensions of your file to the size and shape you will be printing. Then scale/move your artwork as needed.
Colour Separations
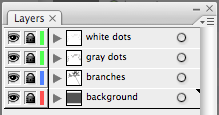
 Once you have everything how you want it, gather up all the elements you want to be the same colour on one layer together. Then, stack the layers in the order your want them to print. Stacking them in order is more for you to get an idea of what the final product will look like.
I usually keep everything in the colours I’m intending to print up to this point, but remember that your films will have to be purely black and white with no shades of gray. Any gradients have to be halftoned.

Print Your Films
Edit all the layers you will be printing to be purely black on white and print off one transparency for each colour you’ll be printing.
If you’re printing your films at a copy place, export the artwork on each layer as a separate PDF and make sure you uncheck “scale to fit” so all your layers are at 100%.
Go Print
Grab your films and go print! If you’re in Pittsburgh check out Artist Image Resource’s open studio. You can show up with your films — or even just your files and print your films there — and use all their equipment and screens for cheap.
